Overview
The Customer Signup Form allows your customers the ability to complete their waitlist signup from any device, at any time. They will not need to create an account to do this.
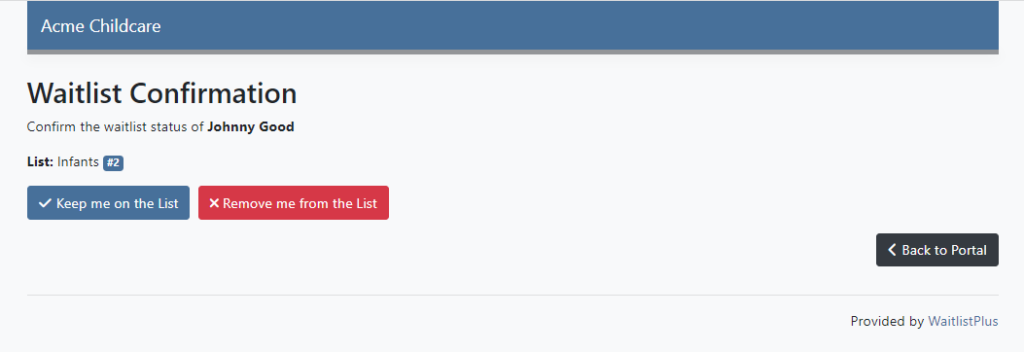
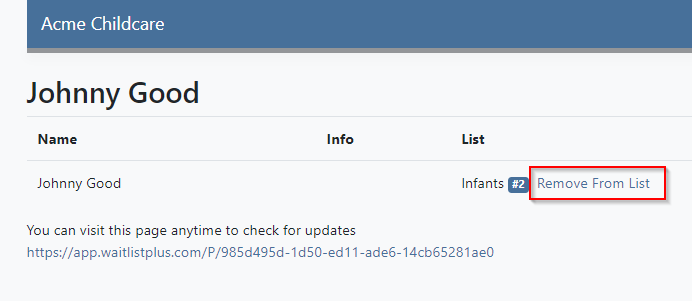
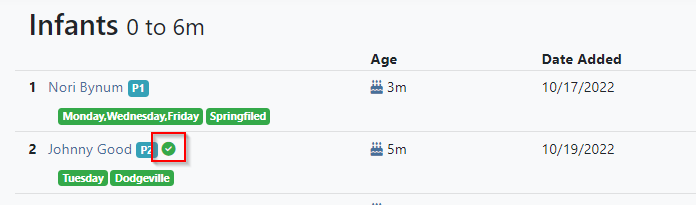
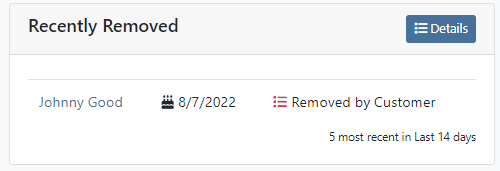
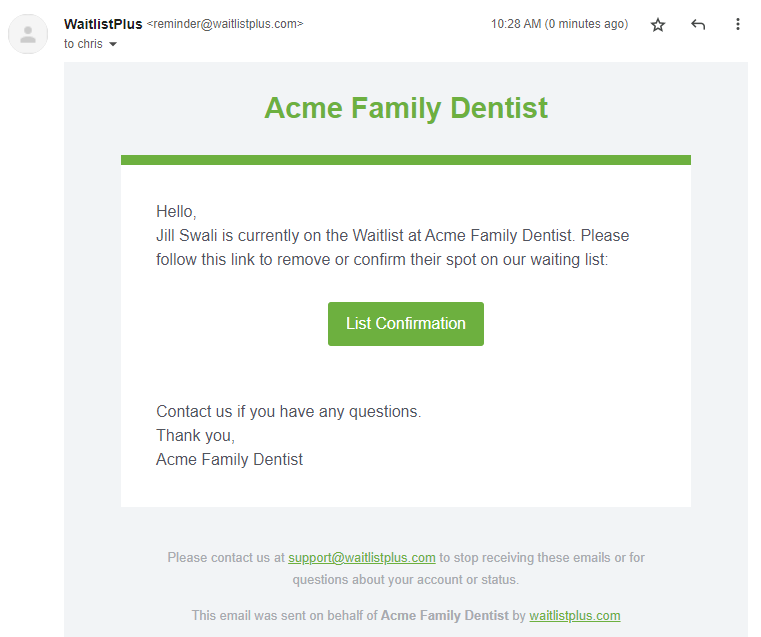
This feature is part of our Customer Portal which gives your customers self-service access to some activities within your waitlist including signup, confirmation, and removal.
Setup
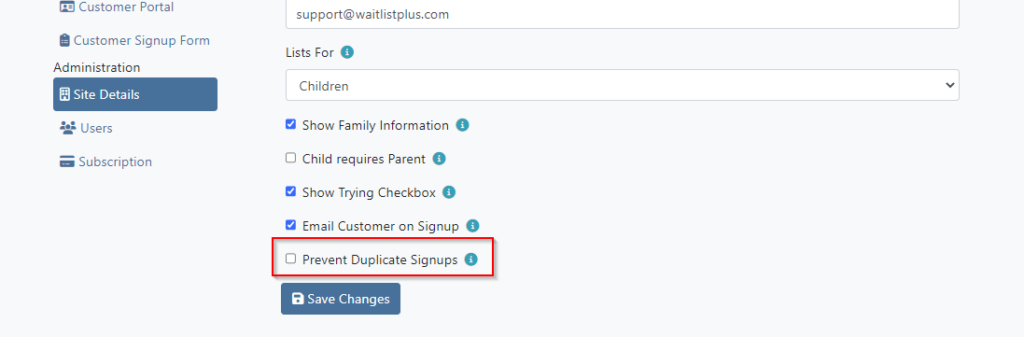
To enable or make changes to your signup form to Go to Settings > Site Settings > Customer Signup Form. Below is an overview of what each of the fields on this settings page does.
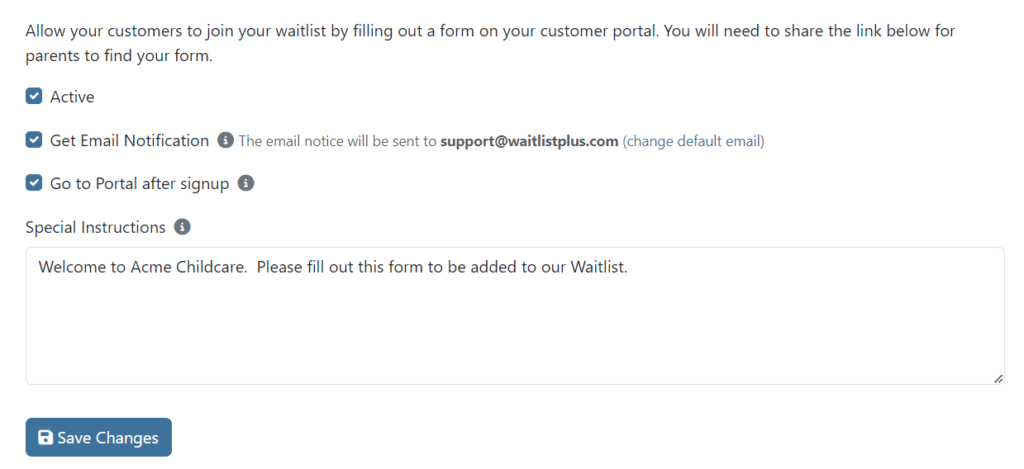
- Active – The Active checkbox will turn this feature on. When not checked your customers will not be able to see the form.
- Get Email Notification– If checked you will be sent an email each time a new person is added to your list via this signup form.
- Go to Portal after signup – After completing the signup process would you like the customer to be sent to their portal page. The portal must be active for this to work. If not checked, they will be directed to a basic page with a generic “success” message.
- Special Instructions – Here you can enter a message that will be shown to your customers at the start of the signup process under “Waitlist Instructions”. If you leave this blank that step will be skipped.
Links to the signup form
Now that you have your signup form all set up you need to direct customers to it. The most common ways to do this are to put a link to the signup form somewhere on your website, or include the link in an email. Directly below the settings, you’ll see a section for Signup Form Links.
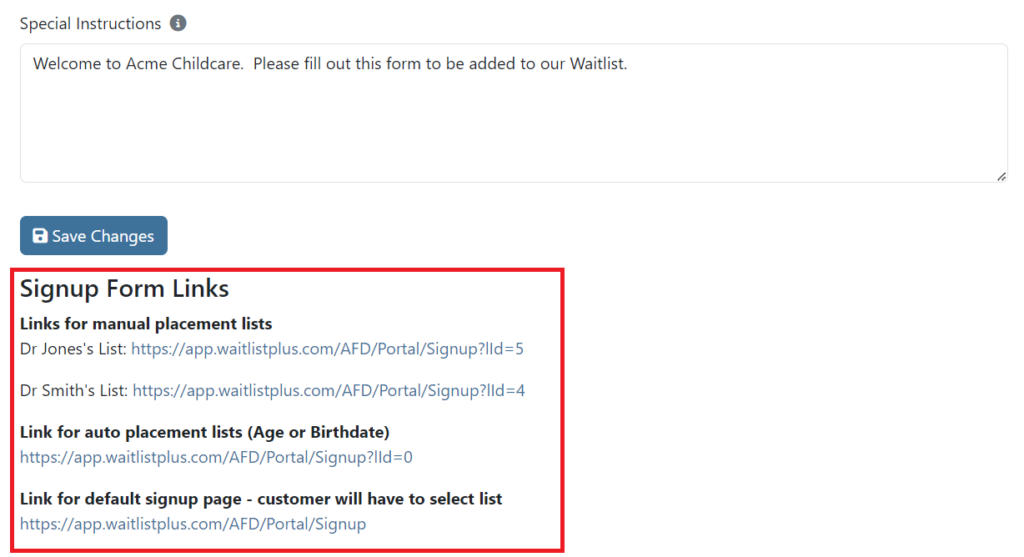
Depending on how your lists are setup, you may have multiple links you can use from. Pick the list link(s) that best work for you.
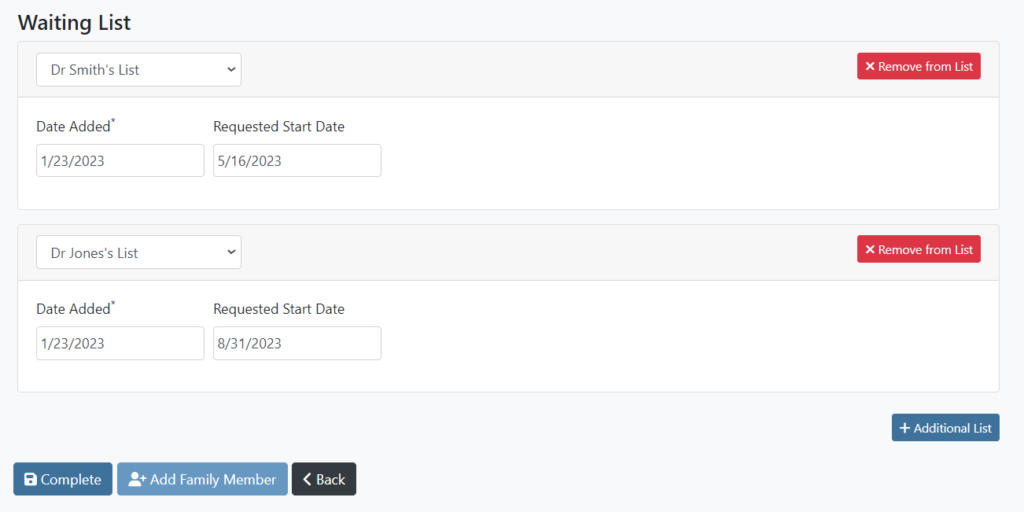
- Links for manual placement lists – If you have Manual Placement lists, you will have a unique link for each list. This will default to the specified list and will not allow the customer to change it.
- Link for auto placement lists (Age or Birthdate) – If you have one or more Age or Birthdate based lists, this link will default to that set of lists. When adding a person to a list, it will require a birthdate and will automatically select the correct list. The customer will not be allowed to change it.
- Link for default signup page – customer will have to select list – This link will allow the customer to select any list they like including Age or Birthdate based lists.
Questions
What fields can my customers see?
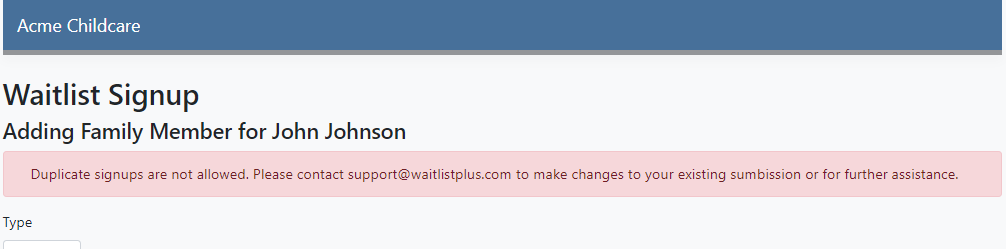
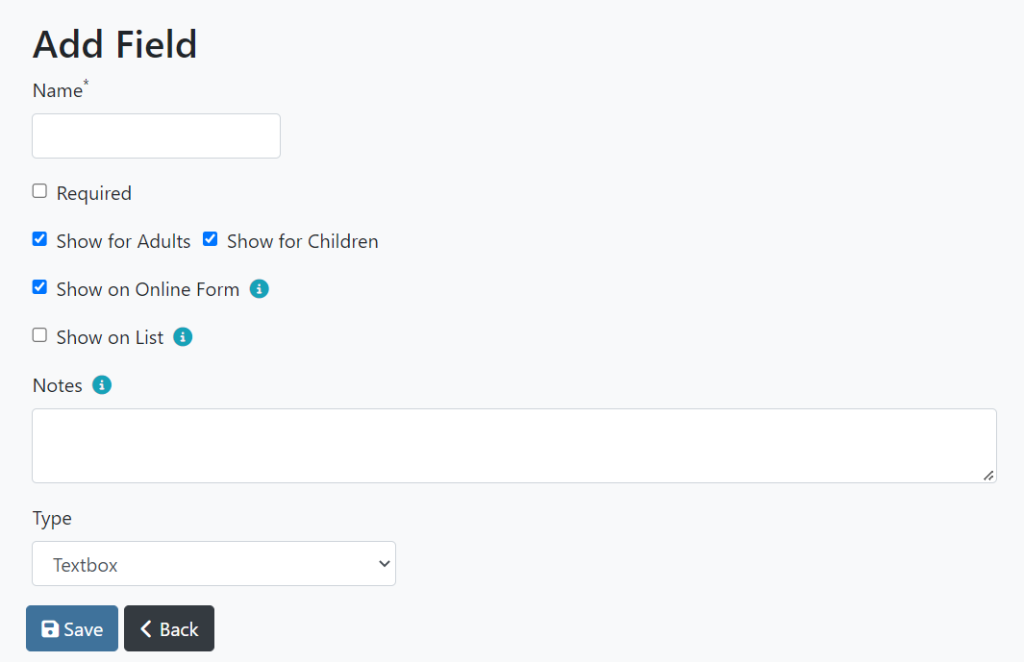
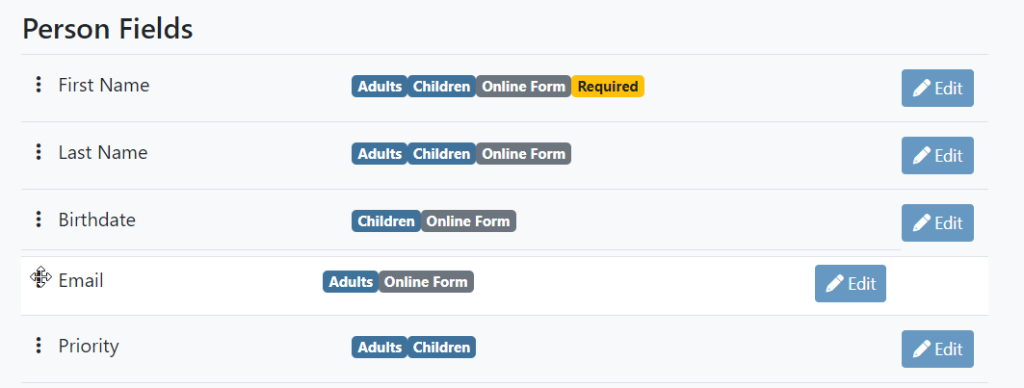
All form fields with Show on Online Form turned on will be shown in the Customer Signup Form. Of course they also need to be enabled for the person type (Child/Adult) that is currently being created.
For details on how to configure your form fields check out Customize your Form Fields
Can I embed the signup form on my website?
For the best customer experience we recommend you don’t embed the signup form in your website. With the numerous device sizes and modern browser security features, it’s not an optimal experience for your customers. If you are really sure that this is the best route for you, you could have your website developer use an iframe to do this. While this may be possible and you are welcome to try it, we do not provide support for this method.