
Email reminders periodically tell families that an applicant is still on your waitlist. Include a confirmation link so they can confirm continued interest or remove the applicant from a list.
Before you activate reminders
Turning on Active can trigger reminders within 24 hours. People who have already been on the list longer than the reminder interval may become due immediately. Finish and preview your message before activating the schedule.
A reminder is sent about an applicant to their family email contacts. Siblings can generate separate messages. Missing or invalid addresses and unsubscribed contacts do not receive emails. See Sending Emails for recipient details.
Edit and save the email message
- Go to Settings > Reminders.
- In the Email message section, click Edit.
- Update the Subject and Body. Include
[[confirm-button]]for a confirmation button or[[confirm-link]]for a text link. - Use Preview email to review the message, then click Save changes in the message editor.
- Return to Reminders and check the displayed message.
The confirmation link lets the customer confirm or remove the named applicant for the list beside the action. Confirming one child does not confirm their siblings. See Customer Removals and Confirmations and Email Content.
Set and save the reminder schedule
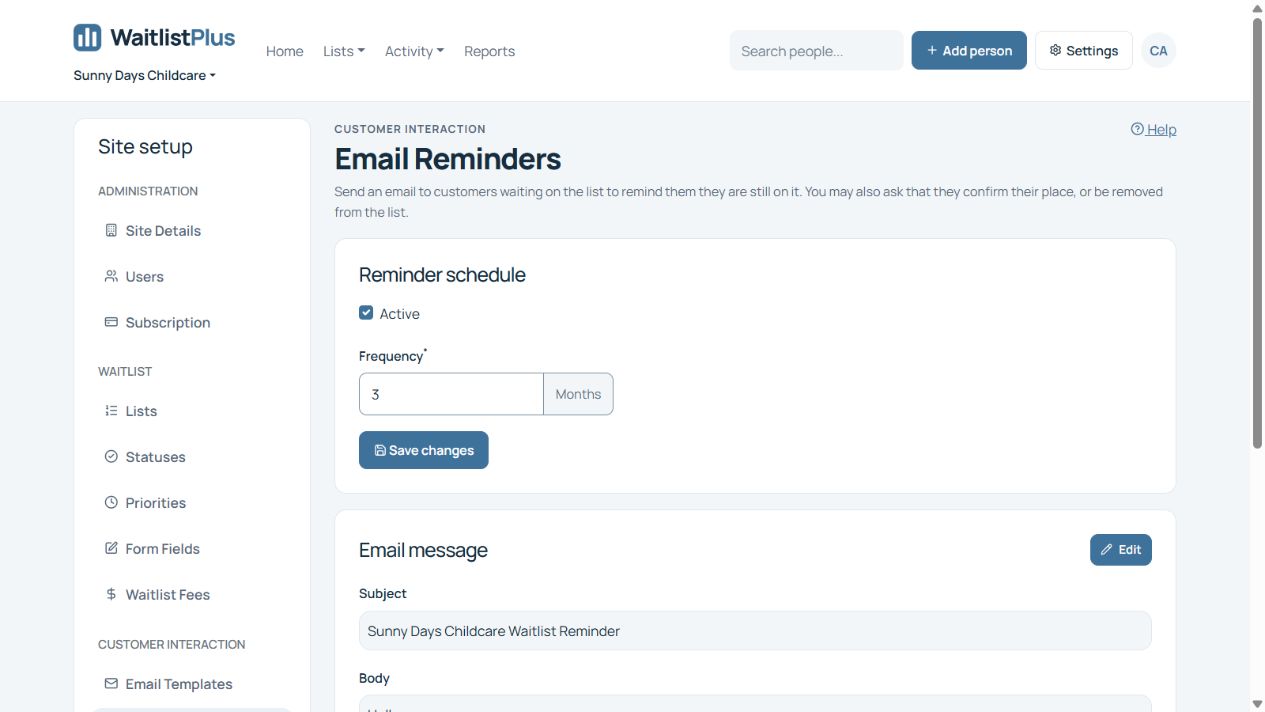
- Under Reminder schedule, set Frequency to the number of months between reminders. The minimum is one month.
- Review who may already be due before checking Active.
- Click Save changes in the schedule section to save Active and Frequency. Editing the email message and saving the schedule are separate actions.
When are emails sent?
The reminder job runs nightly using your site’s time zone. Eligibility is evaluated for each active list membership, including intermediate statuses such as Tour Scheduled or Spot Offered. A person on more than one list has a separate reminder schedule for each membership.
- First reminder: The membership’s Date Added plus the configured frequency determines when it becomes due.
- Later reminders: The last reminder sent date plus the configured frequency determines when the next reminder becomes due.
- Activation or reactivation: The next nightly run re-evaluates each membership. Existing overdue memberships can receive reminders at that run; turning reminders back on does not start a fresh interval for everyone.
- Changing Frequency: The next nightly run uses the updated interval. Shortening it can make memberships due immediately; lengthening it can postpone the next reminder.
- Disabling: Clear Active and save the schedule to stop automatic reminder sending.
For example, suppose you activate reminders on June 1, 2027 with a three-month frequency. A membership added on January 1, 2027 is already overdue and is eligible at the next nightly run. A membership added on April 11, 2027 first becomes due on July 11, 2027. If a reminder is sent on June 1, the next one becomes due three months after that send date, on September 1. These are scheduling examples, not guaranteed inbox arrival times.
Confirmation records the customer’s continued interest for the list they confirm. The reminder timing rules above use Date Added and the last reminder sent date; check confirmation history separately when deciding whether cleanup is appropriate.
Allow time for customers to respond
If you use reminders before List Cleanup, send them far enough ahead to allow delivery and a reasonable response period. Do not activate reminders and immediately remove people who have not yet confirmed. A failed delivery or an email unsubscribe is not a request to leave the list.
If a reminder was not received
Check the address and delivery history before sending another message. See An Email Was Not Received: Delivery and Unsubscribe Help for bounce, spam and unsubscribe troubleshooting.