There are multiple ways to send emails from WaitlistPlus.
- Automatic emails including Reminder and Added to Waitlist Notification/Portal Confirmation
- Adhoc email to one or all lists
- Adhoc email to multiple people on a list
- Adhoc email to a single person
- Get all email addresses so you can use your own email client
Automatic Emails
There are two emails that we send out automatically Added to Waitlist Notification/Portal Confirmation and Waitlist Reminder.
You can view their respective help articles for more detail on setup and behavior of these emails.
Adhoc Emails
Adhoc emails can be sent to any person on the list at any time. You can use an existing Email Template, or write your own custom Subject and Body.
These emails will be saved to the notification history just like Automatically sent emails.
Send to an Entire List
- While viewing your list, Click on the Email > Entire List button
- Fill out the email Subject and Body, or select a Template in the top right corner.
- In the Body and Subject sections, you can use placeholders to fill in details about the person on your list, or email recipient.
- Click Send

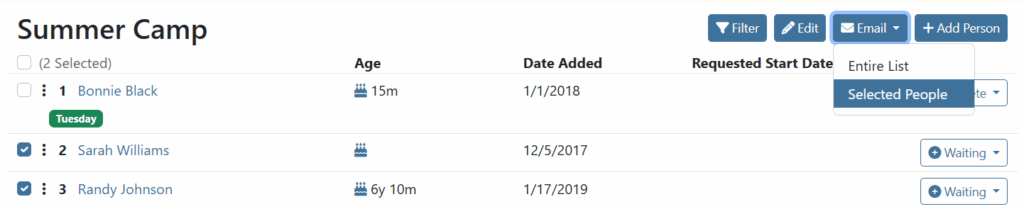
Select People on a List to Send to
If you want to send an email to multiple people on a list, but not everyone, you can use the checkboxes to the left of their name. Once you have the people selected that you want to send to, Click the Email > Selected People button.
Send to a Single Person
- While viewing a person, Click on the Send Email button
- Fill out the email Subject and Body, or select a Template from the top right corner
- Click Send
Get Email Addresses
- On the home page click Export > Get Email Addresses
- Once on the Email Addresses page, you can select which lists you want to include and what you want to separate them by. “Comma” is supported by most email clients.

- Then click Get Emails. The result will be a long string of text which you can copy and then paste into the To line in your email client.