Overview
At the heart of WaitlistPlus is the ability to collect information from your customers. We have a default form which collects basic contact information, but you have the ability to customize this form in a few ways.
To make changes to your forms to Go to Settings > Site Settings > Form Fields.

Create New Fields
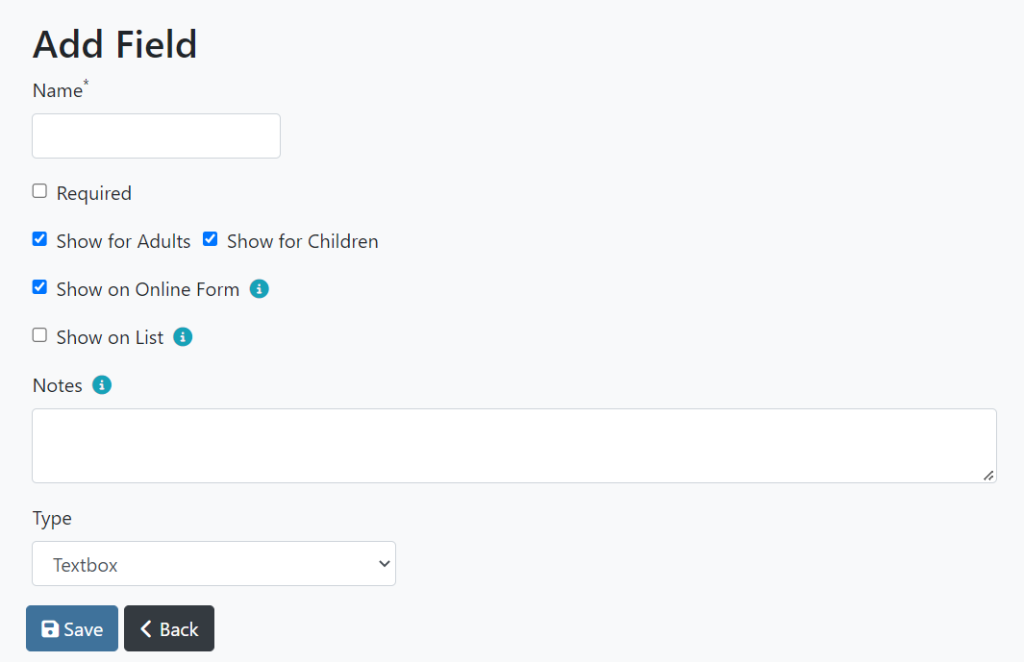
Near the bottom of the Form Fields settings page, click on the “Add Field” button. Here you can fill out all of the details for your new custom form field. For details on what each of these form field properties control, see below under Customize Fields.
Customize Fields
When adding or editing a form field, there are many properties which you can change to control the look and behavior of the field. These properties are:
Name
This will be the primary way to identify a form field. It will appear as a label next to the field on your form.
Required
When checked, this field will be required when visible. You will not be able to save the form unless this field has been filled out. Required fields will have an asterisk (*) next to the name on the form.
Show for Children/Adults
If you have a field that only applies to a child or adult, this is how you can determine which person types will see the field.
Show on Online Form
If checked, this field will show on the Customer Signup Form. All fields will show in the Admin area of WaitlistPlus regardless of this setting.
Show on List
When checked, the value input will be displayed on your list. See below: The green pills are values input for two custom form fields.

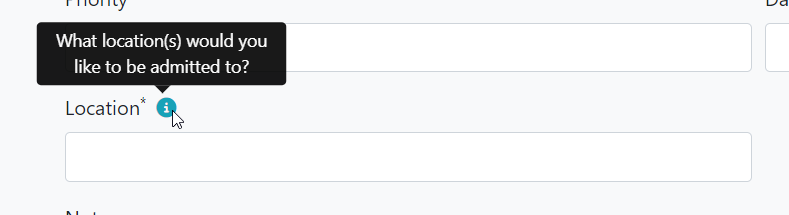
Notes
This is additional text that will appear as a popup from the blue information circle next to your field’s name. If you leave this blank, the blue icon will not be displayed.
Type
The type property controls how the field appears in the form, and what type of inputs it will accept.
Here is a list of all available types:
Textbox
Allows the user to type in their response for this field.
Medium Textbox
Same as above, but it’s twice as long to allow for slightly longer responses.
Big Textbox – Multiline
This is a much larger text box and allows for longer responses which may be full sentences or paragraphs. It will take up the full width of the page and multiple lines. It’s also expandable by the user if they really have a lot to type.
Date
This field type will provide a popup calendar and will make sure that the user enters a valid date.
Dropdown – Select One Option
A dropdown will be presented with a list of options specified in the Dropdown Options property. The user can select at most, one option. You can add as many options here as you like. Click Enter or add a comma to separate options.
Dropdown – Select Multiple Options
Similar to the above dropdown, but the user can select as many options as they like.
File Upload
Will prompt the user to select a file from their device and upload it to WaitlistPlus.
Change Field Order
The order in which the fields appear on the form can be changed. To change, go to the Form Fields settings page, grab the three dot icon just to the left of the field name, and drag the field up or down.
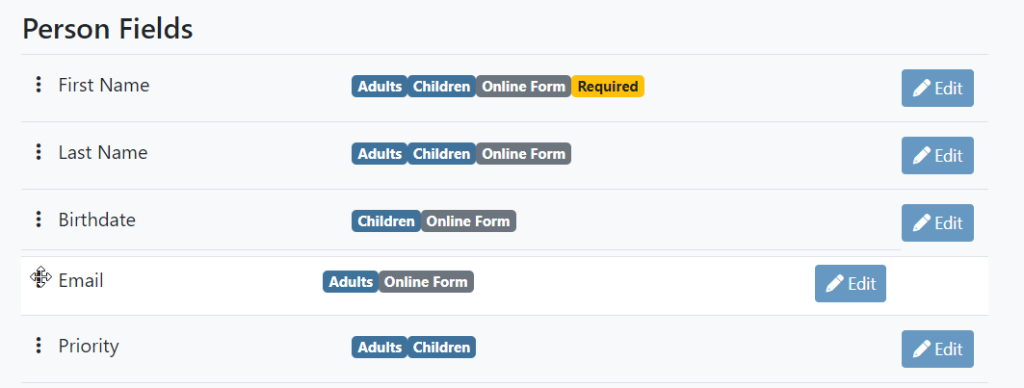
This order will be used when the form is displayed on the screen. The fields will be placed on the form in a left to right, top to bottom manner.