
If two classrooms or locations serve the same age group, you do not necessarily need two automatic-placement lists. A single age-based queue plus a custom preference field can help you find suitable applicants when a place opens.
Choose how to organize the queues
| Approach | Use it when | What it means |
|---|---|---|
| One list per non-overlapping age/birthdate range | You can choose applicants for any matching class from one queue. | Automatic placement remains simple. |
| Manual lists for separate classes | You need an independent queue and position for each class. | You select lists and manage moves instead of automatic age-based class placement. |
| One automatic list plus a preference field | You need to filter the same queue by class or location preference. | People retain one position in the shared queue; the filter does not create separate memberships. |
Age and Birthdate placement require non-overlapping placement ranges so the app can choose one automatic destination. Adjacent automatic-placement ranges must meet without gaps. Age ranges use a person’s current age; Birthdate ranges use calendar birthdates. Manual lists can be combined with either automatic type. See Setting up Lists for sorting, placement, and boundary examples.
Example: one queue with a Preferred Location field
Sunny Days Childcare uses one Infants list for the relevant age range. Families can say they prefer Downtown, West Side, or both. Staff filter the shared Infants list when a place opens at a particular location. You can use the same approach with a Classroom Preference field; keep the field name and options consistent throughout your setup.
1. create the custom field
- Open Settings > Form Fields and click Add Field.
- Set the name to Preferred Location.
- For child applicants, enable Show for Children. Enable Show on Online Form if families should choose their preferences during signup.
- Choose Dropdown – Select Multiple Options and enter Downtown and West Side as separate options.
- Enable Show on List if you want staff to see the selected values beside the person. Make the field Required only if every applicant must choose a preference.
- Click Save.
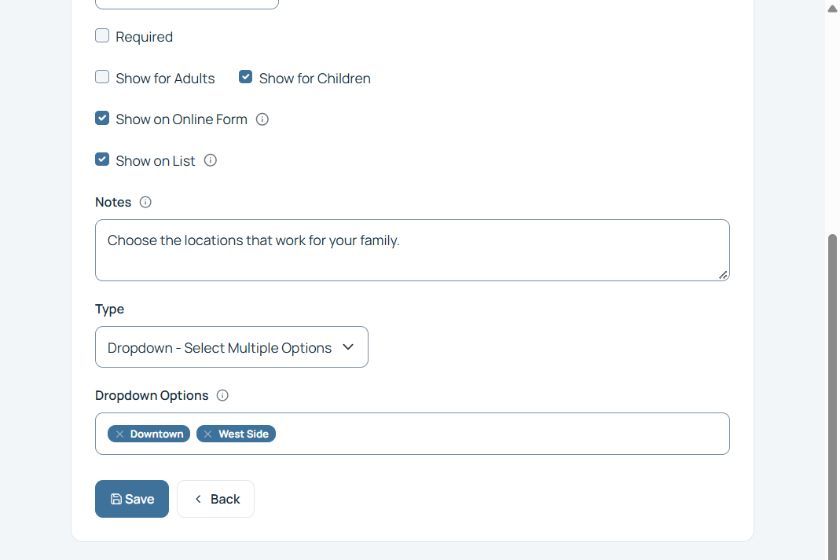
The dropdown options in this example are locations. They describe preferences within one queue; they do not create new sites or separate location-specific positions.
2. collect the preference
The field is available on the applicable staff person forms and, when enabled, on the Customer Signup Form. Ask families to select the locations they would accept. For existing people, open the record, click Edit person, set Preferred Location, and click Save Changes.
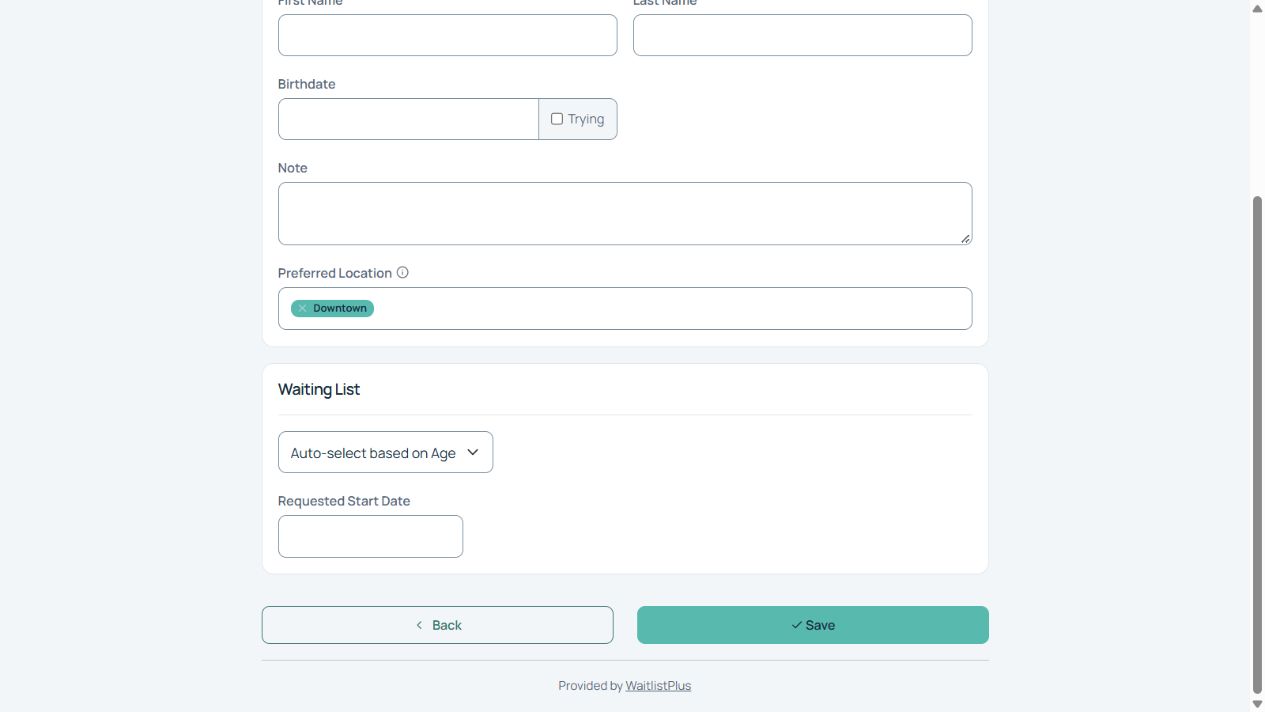
In the public form above, Downtown is selected while Waiting List remains on automatic age placement. The location selection does not replace the person’s birthdate or determine their age group. See Customize your Form Fields for visibility settings.
3. filter the shared list
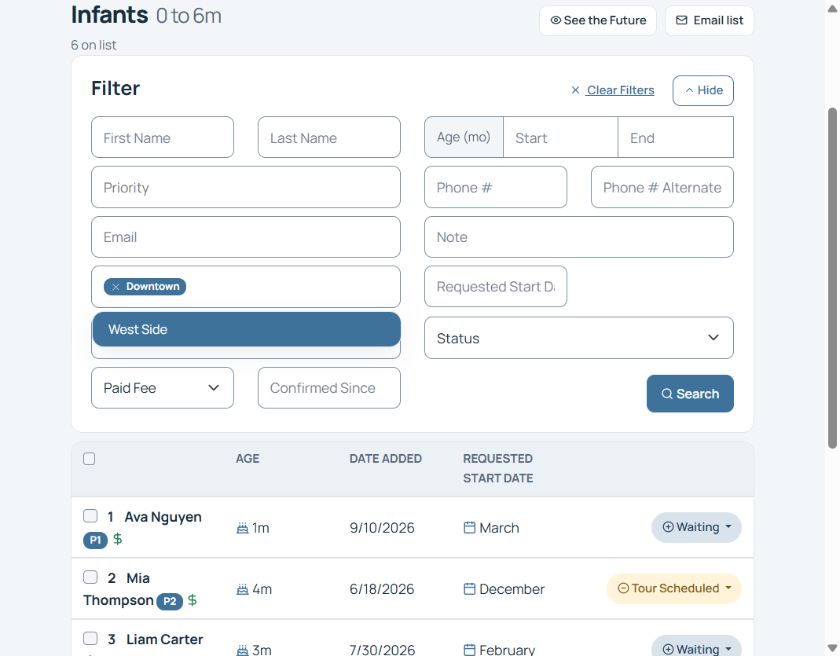
- Open Lists and select the relevant list, such as Infants.
- Click Filter.
- In Preferred Location, select Downtown.
- Click Search to apply the filter.
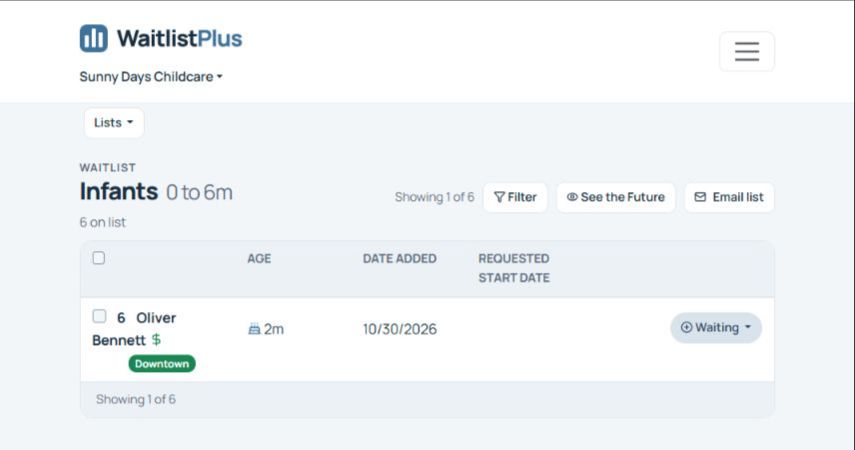
- Review the matching people and their existing positions in the shared queue. Use Clear Filters when you want to see the full list again.
A filtered view is not a separate waiting list
Filtering does not add or remove memberships or give someone a separate Downtown position. The person still belongs to the original list. To maintain independent queues, use separate Manual lists and, when a person needs more than one membership, enable Allow Multiple Lists.
If locations need separate staff access, branding, or administration, review Supporting Multiple Locations before choosing the single-field approach.