Many customers have multiple locations, and would like to setup WaitlistPlus to manage their lists at each location. There are two different ways of doing this. You can choose which way meets your needs.
Two separate accounts
When to use this method
- If you want to separate the administration (access by your staff) of the lists between locations
- If you want a cleaner separation between locations for customers
Setup
Go to Settings > Your Account > Sites. Click on “Create New Site” Follow the steps to complete site creation. Your existing user account will have access to this site as well, but you’ll have to grant other users access to the new site.
If you do not want the same user account to have access to both sites, go to the registration page and create a new user account and site for each location.
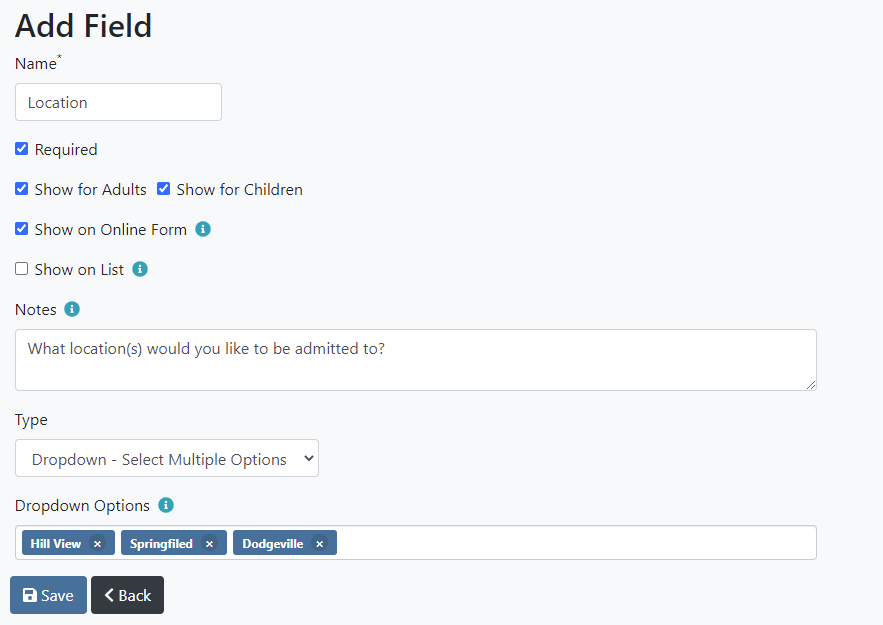
One account with a “Location” field
When to use this method
- If your customers are likely to sign up for multiple locations
- If you have a smaller number of customers on your list, and you want to save some money on subscription fees
Setup
Go to Settings > Site Settings > Form Fields. Click the “Add Field” button. For Type select “Dropdown – Select Multiple Options” and enter the list of locations that you have.
Once your new field is setup, It will appear on the form like this.
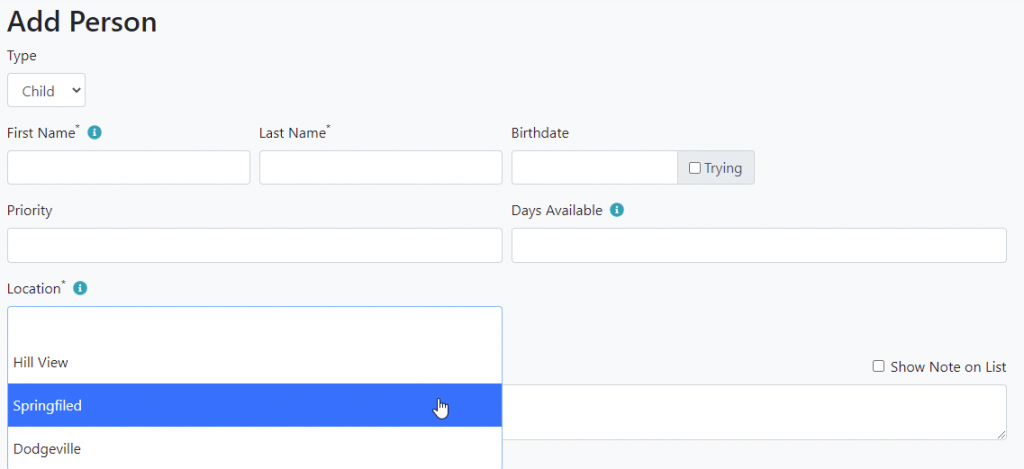
When reviewing your lists, you can filter on this new field to see only the people who are interested in a specific location.
