Charge your customers a waitlist fee during signup. We take a small percentage for processing the payment and the rest is transferred to your bank account.
How it works
- Provide business ownership information and bank account details
- Set your fee amount
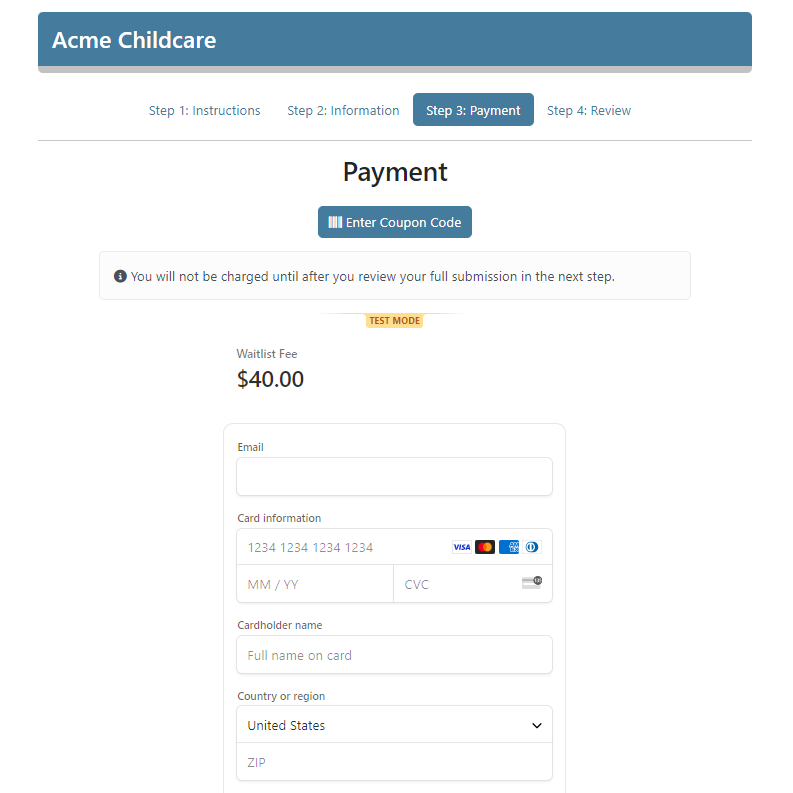
- Customer provides payment information during signup
- We process the payment, take a small fee and deposit the rest in your bank account
Eligibility
This feature is currently available only for businesses in the US (except HI, NM, PR, and WY). Please contact support@waitlistplus.com if your business is outside the US or in one of the excluded states and you would like to use this feature.
Processing Fees
Processing fee for US based credit cards, Apple Pay, Google Pay, Amazon Pay is 2.9% + $0.30. We also charge a 4% platform fee on each transaction.
Setup
Payout Account Setup
You will need to register with our payment provider Stripe. They will process all payments and distribute the payouts to your checking account.
To set up your Connected account at Stripe, go to https://app.waitlistplus.com/Fees/Setup
During this process you will need to provide the following information:
- Business structure (Sole proprietor, Single owner LLC, Multi owner LLC, Non-profit, etc)
- Legal Business Name
- EIN (or other appropriate Tax Id, SSN if Sole proprietor)
- Personal info of someone who can sign on behalf of the business
- Full Name
- Job Title
- Birthdate
- Mailing Address
- Phone Number
- Last 4 of SSN
- Bank account info
- Routing Number and Checking Account Number (Preferred)
- Or… Username and Password of online banking account
Set Fee amount
After setting up your Payout Account, go to the Fees Settings page and enter your Fee Amount. This will be the amount charged to your customers for each person they add to the list. For example, the fee amount below is $40. If a Family has three children added to the list and two parents, they would be charged $120 ($40 x 3 people).
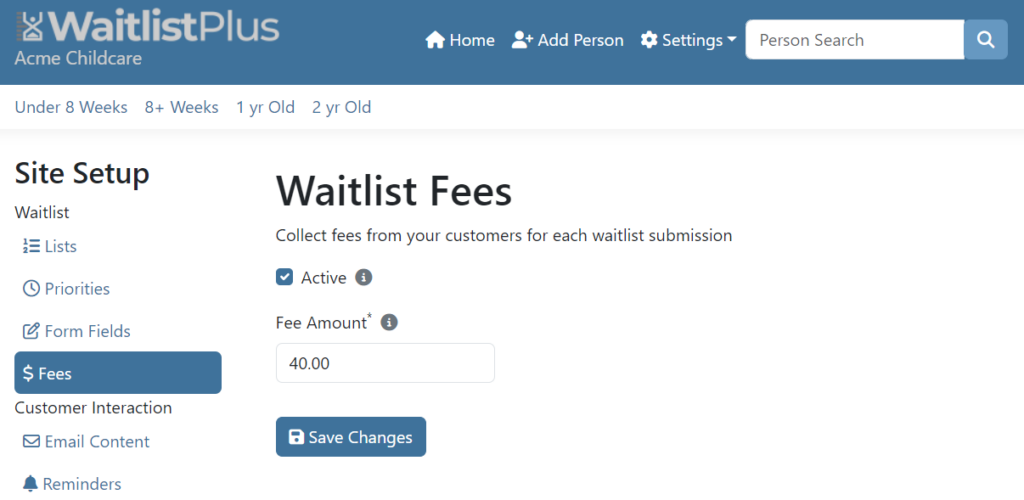
Make sure to check the Active box to turn this feature on and click Save Changes.
Add Receipt to Email content
If you want to automatically email a receipt to your customers after signup, you can edit the Email Content to include a receipt link. To do this go to Settings > Site Settings > Email Content and edit the content for Added to Waitlist via Portal Confirmation. Somewhere in the content, you will want to add the <receipt-button> or <receipt-link> placeholders. View the Email Content article for more info.
Viewing Charges
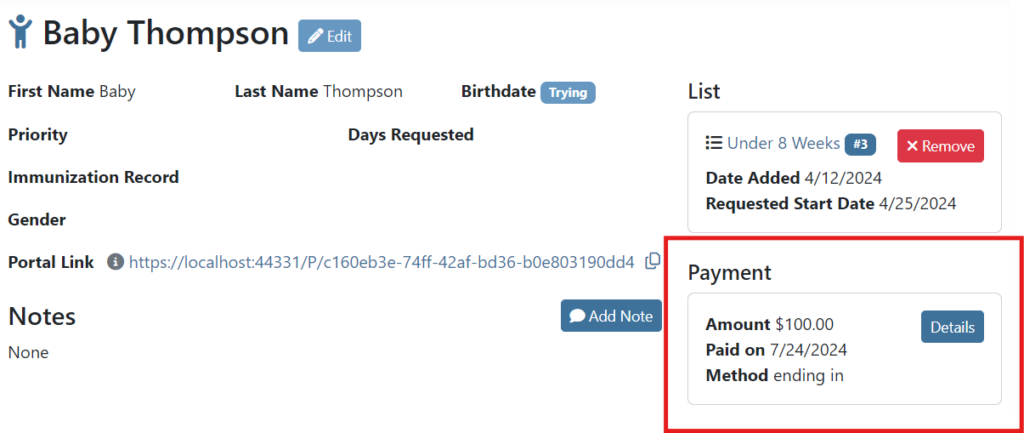
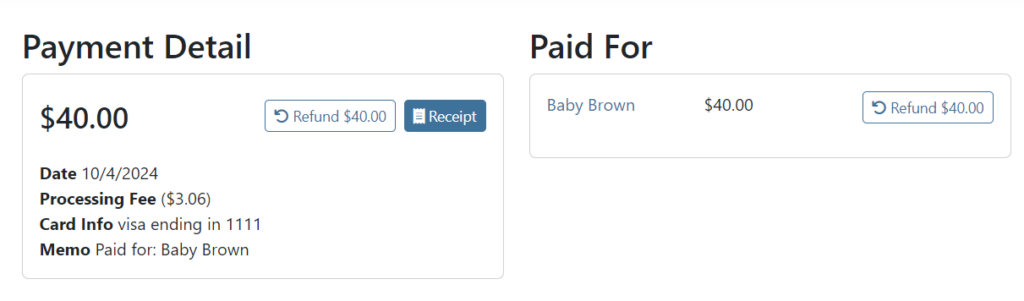
From the person detail page, you can see the payment information, and click on the Details button for more information.
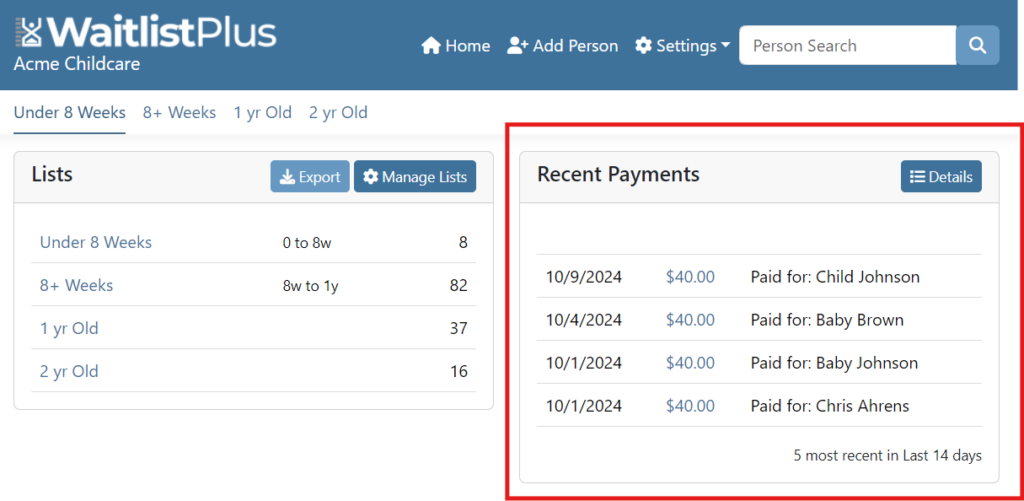
In the Recent Payments widget on the dashboard, you can see and view recent payments, or click on the Details button to take you a report to see all payments.
Additional Fee Features
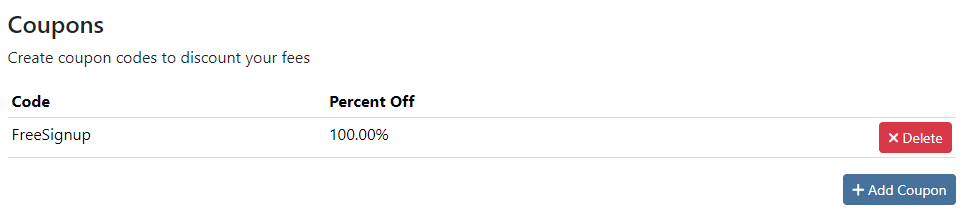
Coupons
You can create coupon codes to discount or waive your fee. Under the fee settings you can view, add, or remove coupon codes.
Refunds
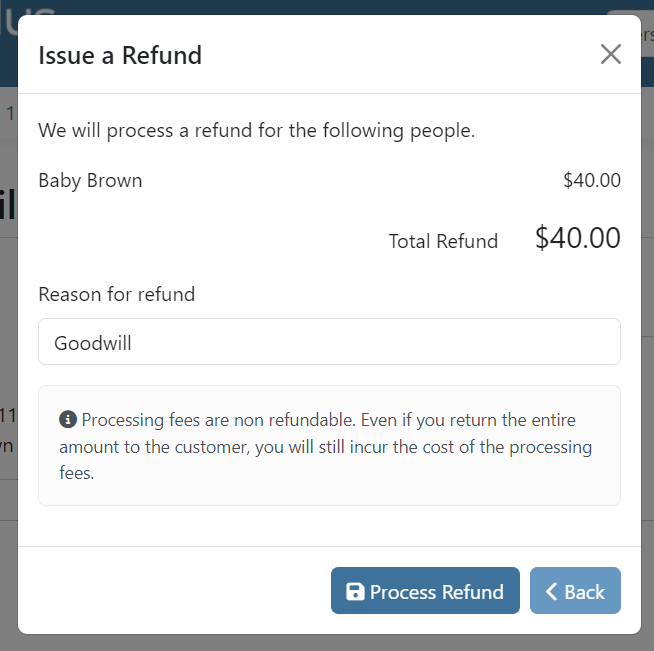
If you need to refund a charge, you can do so from the payment details page. You can get to the the payment details page from a payment link in any of the places we display payment info including the Dashboard Widget, the Person Detail page, or the Payments Report.
Once on the Payment detail page, you can refund the entire payment, or for a single person if the payment included multiple people.
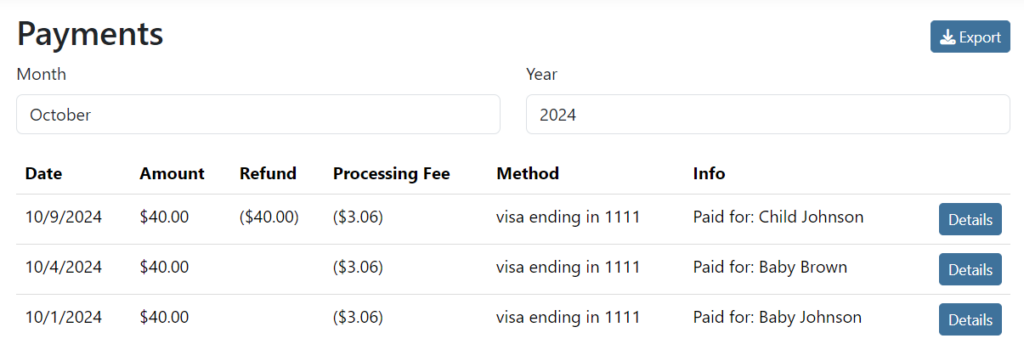
Reports
To view or export all payments go to the Payment Report page. You can click on the Details button on the Payments Widget, or go directly there using this link app.waitlistplus.com/Payment
Mark existing people as Paid
If you have people on your list who have paid outside of WaitlistPlus and you want to record their payment in the app go to the Person Detail page of the person you want to mark as paid, and click the Mark as Paid button.
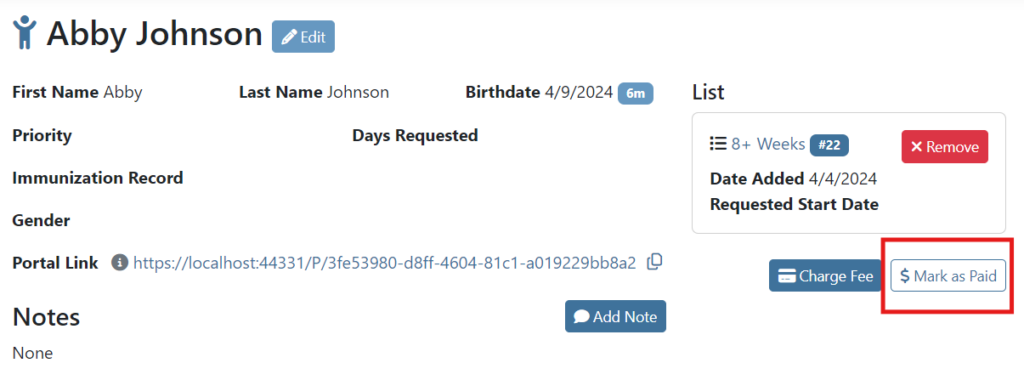
You will then record the amount and date they paid as well as any additional text you would like to record.
Payment Indicator
On your lists there will be a dollar sign ($) next to the name of each person who has a payment recorded. When you hover over that icon, you can quickly see how much they have paid.
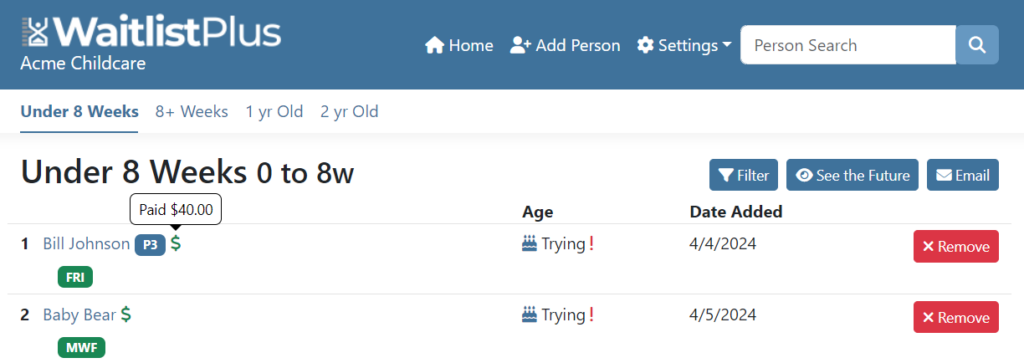
People will show as paid if they have been Marked as Paid manually or paid the fee (at full price or discounted via coupon) within WaitlistPlus.