
Customers can confirm continued interest or remove a membership using their unique portal or an email confirmation link. These choices apply to an existing applicant; they do not create a new signup.
Enable access from the customer portal
Go to Settings > Customer Portal, enable Active and Show confirm/remove buttons, then click Save changes. Send the correct private family portal link as described in Set up and share the customer portal.
Open the confirmation page
- From a customer email, follow a confirmation button or link. Add
[[confirm-button]]or[[confirm-link]]to the relevant email content when you want to provide this route. - From the family portal, use Remove from List beside a membership. The label opens a page with both choices; opening the page does not remove the person.
The confirmation page names the person and displays their memberships. Choose the action beside the correct list.
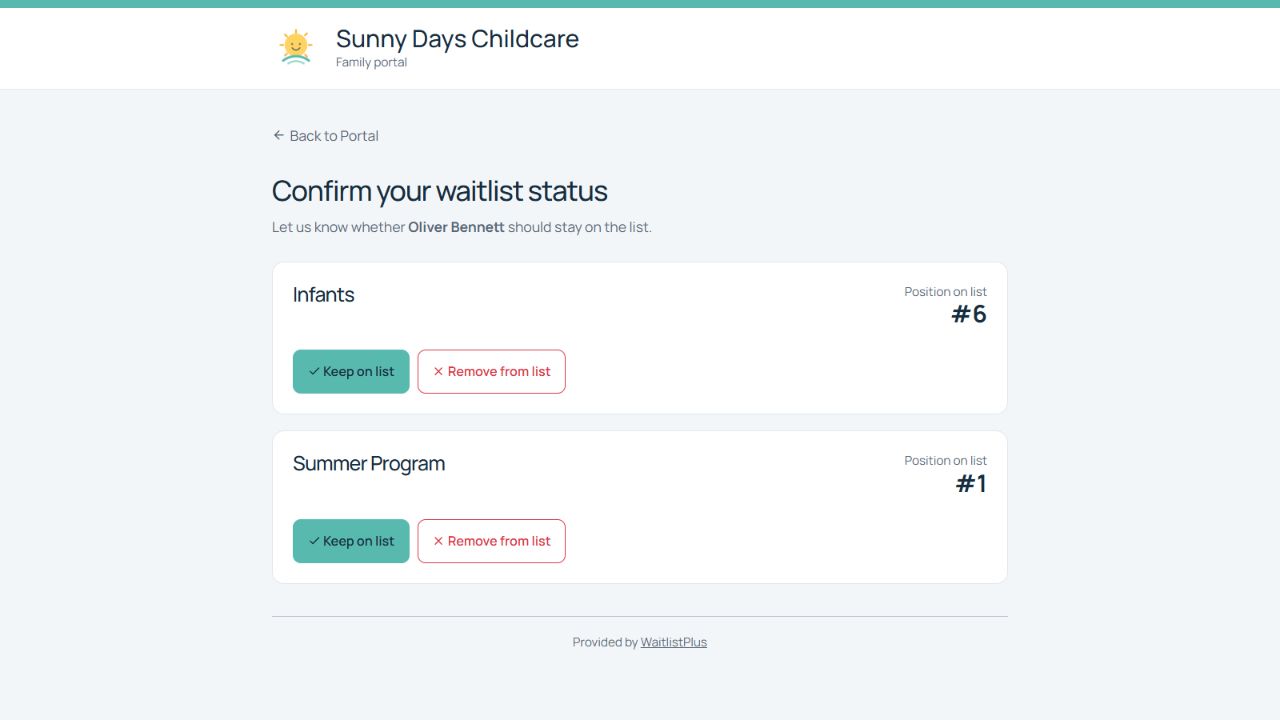
What each choice does
| Choice | Result | Scope |
|---|---|---|
| Keep on list | Records the customer’s continued interest and confirmation date. The membership stays active. | Only the list beside that button for the named person. |
| Remove from list | Removes the person’s active membership in that list. The person record remains in the app. | Only the list beside that button for the named person. |
These are not whole-family actions. If Oliver is on Infants and Summer Program, keeping him on Infants does not confirm Summer Program. Removing him from Summer Program does not remove him from Infants. Confirming Oliver does not confirm a sibling; review each applicant and each membership separately.
Check confirmations in the staff app
- Find the applicant or open their list.
- Look for the confirmation indicator beside their name. Hover over the confirmed icon to see the recorded date.
- Use the list’s Confirmed Since filter when reviewing recent confirmations.
- For people with several memberships, review the relevant list rather than assuming confirmation applies everywhere.
A confirmation expresses interest; it is not an offer, enrollment, or payment. It also differs from a staff-configured progress status such as Tour Scheduled. See List Status.
Find a person after they leave a list
- Use Search people to find the existing person by name, email, or phone number. Search includes people removed from lists.
- Open Activity > List Removals to review removal entries, including list, date, status, and reason. The dashboard may also show a recent removal.
- Open the person to check their remaining memberships and family information.
If a customer removed a membership by mistake, staff must add the existing person back manually once an immediate Undo option is no longer available. Open Edit person, use Add to List if they have no memberships or Additional List when appropriate, choose the correct list, review Date Added, and save. Check the resulting position; do not assume the previous number is restored. Follow Manage a person’s place on a list for the detailed steps.
Removal is different from deleting or unsubscribing
- Remove from list: ends that active membership; the person record is still searchable.
- Delete person: is a separate staff action on the person record. It is not required to end a membership.
- Unsubscribe from email: changes email preferences and is not the same action as leaving the waiting list.
For periodically requesting confirmation, see Email Reminders. For staff removal of older unconfirmed memberships, see List Cleanup.
For the differences between list membership, person deletion and email preferences, see Remove, Complete, Delete or Unsubscribe: What Changes?.