
Use this checklist to prepare your first waitlist. Start with the staff app, add a sample family, and check the customer experience before sharing your signup link.
You need Admin access to change settings. Managers can manage people on lists but cannot configure site settings. Check the site name at the top of the page before making changes. On a phone or smaller screen, open the main menu to find Settings, then expand the settings navigation if needed.
1. set up your site details
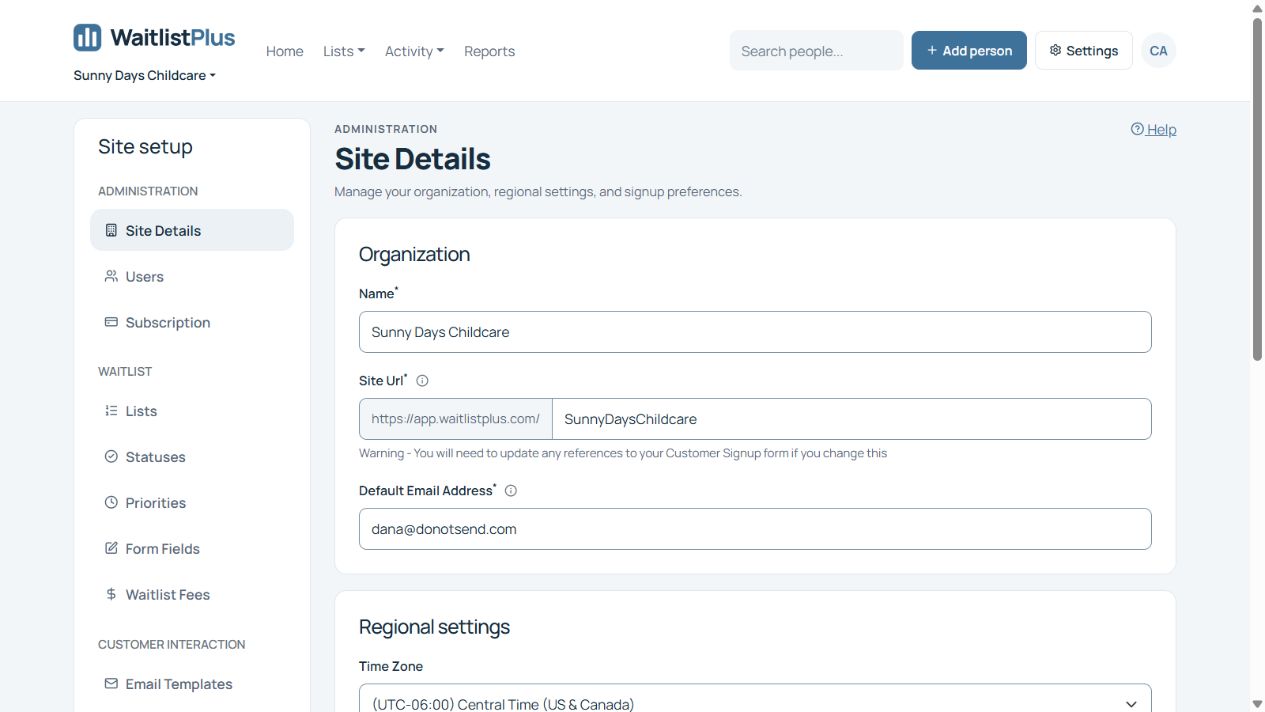
- Open Settings > Site Details.
- Check your organization name, default email address, time zone, and locale. The default email address is used by application functions; Locale controls date formatting.
- Under Lists For, choose Children, Adults, or Children and Adults to match the people joining your waitlist.
- If you need parents or other contacts linked to applicants, enable Show Family Information. To require an adult when adding a child, also enable Child requires Parent.
- Review the other signup preferences, then click Save changes.
You can leave Allow Multiple Lists off when each applicant needs just one list. Enable it only if the same person needs several memberships. You can also choose whether customers receive signup emails and whether duplicate signups are blocked. See multiple lists, signup emails, and duplicate prevention.
2. create your lists
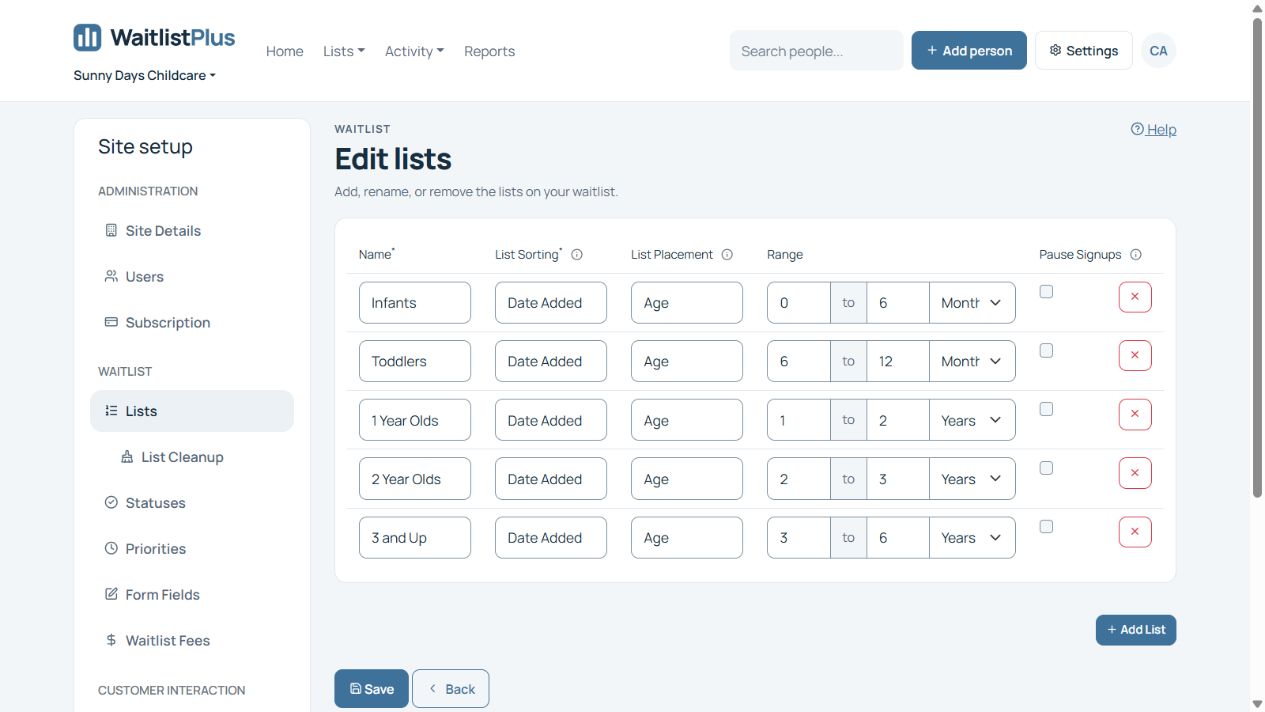
- Open Settings > Lists, then click Edit Lists.
- Add or rename the lists you need. For each list, choose its List Sorting and List Placement.
- For Age or Birthdate placement, enter the ranges and review them together so applicants are covered by the intended lists.
- Click Save.
Sorting controls order within a list. Date Added provides date-based ordering; Manual sorting lets you rearrange people. Placement controls which list a person joins. Age and Birthdate use automatic placement; Manual placement lets staff or customers choose a list. Manual lists can be combined with Age or Birthdate lists, but Age and Birthdate placement cannot be mixed.
For example, Sunny Days Childcare could use age-based Infants and Toddlers lists plus a manual Summer Program list. Read Setting up Lists before choosing ranges. If changing lists that already contain people, first read Changing List Settings.
3. choose priorities and form fields
- If you need priority groups, open Settings > Priorities and configure them. You can skip priorities for a simple first-come, first-served workflow. See Set up and assign priorities.
- Open Settings > Form Fields. Review the default fields and add any information your organization needs.
- For each field, check whether it applies to children or adults, whether it is required, and whether it should appear on the online signup form or on the list.
- Save each settings page or field you edit.
Collect only information you need to manage the waitlist. Start with essential contact and applicant details; optional custom fields can be added later. See Customize your Form Fields.
4. add a sample family and check the result
Use clearly fictional information rather than a real customer for your first check. Review Email Customer on Signup before adding a sample record so you know whether a welcome email will be sent.
- Use Add person to enter a sample applicant. Add an adult family member if your configuration requires one. Follow Add, find, and edit people and families for the detailed steps.
- Open the saved person’s details. Check their name, birthdate, family contact, assigned list, and Date Added.
- Open the list and confirm that the person appears where you expect. If they are on the wrong list, check placement settings and birthdate before changing anything.
Do not delete or recreate an existing customer just to change their list. See Manage a person’s place on a list for editing memberships and positions.
5. configure email messages
- Open Settings > Email Templates. Review the templates assigned to Signup Notification and Portal Signup Confirmation.
- Edit the wording and contact information for your organization, then save the template.
- If you want periodic reminders, open Settings > Reminders. Review the message and frequency before turning reminders on; existing eligible customers may receive an email after activation.
Reminders are optional and can wait until you are ready to contact customers. See Email Templates, Email Content, and Email Reminders.
6. set up customer signup and portal access
You can manage a waitlist through the staff app without sharing online signup immediately. If customers should join online:
- Open Settings > Customer Signup Form. Review Active, the staff email notification, special instructions, and the message shown when signup is unavailable.
- Open Settings > Customer Portal to configure portal access, branding, and whether customers see their positions.
- If you enable Go to Portal after signup, make sure the Customer Portal is active. Save changes on each page.
- Choose the appropriate link under Signup form links. Use a general signup link when customers should choose a list, or the relevant list-specific link for a particular program.
Signup fees are optional; set them up only if you intend to collect a fee. See Customer Signup Form, customer portal setup, and Charging a Fee to Customers.
7. test before sharing your signup link
- Open the signup link as a customer and check the instructions and visible fields.
- If completing a test signup, use fictional details and a test email address you control. Review fees and email settings first.
- Check the review screen before completing the signup, then verify the saved person, family, and list membership in the staff app.
- When the experience is correct, add the signup link to your website or customer communications. Share the public signup link, not a sample family’s private portal link.
What can wait until later?
- Optional priorities and additional custom fields.
- Periodic reminder emails and list cleanup.
- Signup fees, additional staff users, and integrations.
- Importing an existing list: complete and test your configuration first, then follow Import People to Your Lists.